We (not as in royal we, but Diana – of Bon-App design fame – and yours truly) spend our last two weekends busy at the new “Sketching with Hardware” course at the CDTM. Goal was to have some hacking fun with the Arduino platform and create working prototypes in the field of playful interaction. We created the Corkscrew Controller – a steering wheel for Super Mario Kart – and the Marble Sequencer – a beat box for drum beat production – and to keep it short, this was the probably the most fun I’ve ever had in a university course setting.

But let’s start from the beginning…
Warm-up: The Corkscrew Controller
The first weekend we were in for a crash course on electrical circuitry and we also got into keyboard hacking briefly (i.e. ripping out the USB controller of cheap keyboard and rewiring the inputs). Our first challenge was to create a new kind of interaction device for a game we like. The choice fell (obviously) on SNES Mario Kart and after some strolling through the CDTM we found a corkscrew somewhat resembling a steering wheel. We put a magnet on its rotating axis and two magnetic switches left and right besides the axis. After we soldered the wires to the keyboard controller our steering wheel was ready to go.

Concept: Music Creation
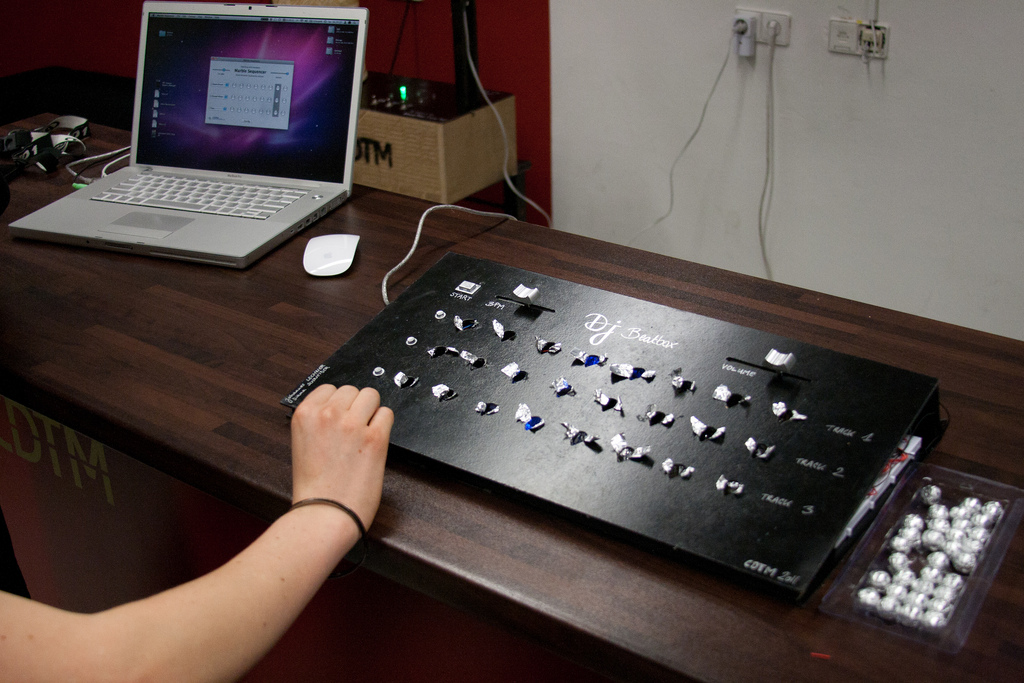
Jazzed from this quick hack, we went brainstorming about what kind of project we wanted work on the next weekend. We circled in on doing something with music creation and since I always enjoyed playing with drum computers (such as DrumTrack8 on the iPhone) we decided to create a tangible interface for a drum sequencer. We wanted to offer eight beats on three tracks and some sliders for BPM and volume control. Next to the actual hardware controller we also needed something to playback the drum samples, so while Diana was responsible for the design of the hardware, I took over the software development.
Software: Cocoa on OS X and some good old 808 samples
The development of the sequencer software itself was pretty straightforward: I went with a NSTimer driven approach and triggered the playback of preloaded NSSounds. The communication with the Arduino controller was somewhat more difficult. Luckily the sample project on the Arduino Cocoa page helped out a lot. As for the drum samples, I’ve stumbled upon some great Roland TR-808 samples. Next to marbles (blue means that the sample will be played on this beat) the UI also features a gray rectangle that indicates the current beat.

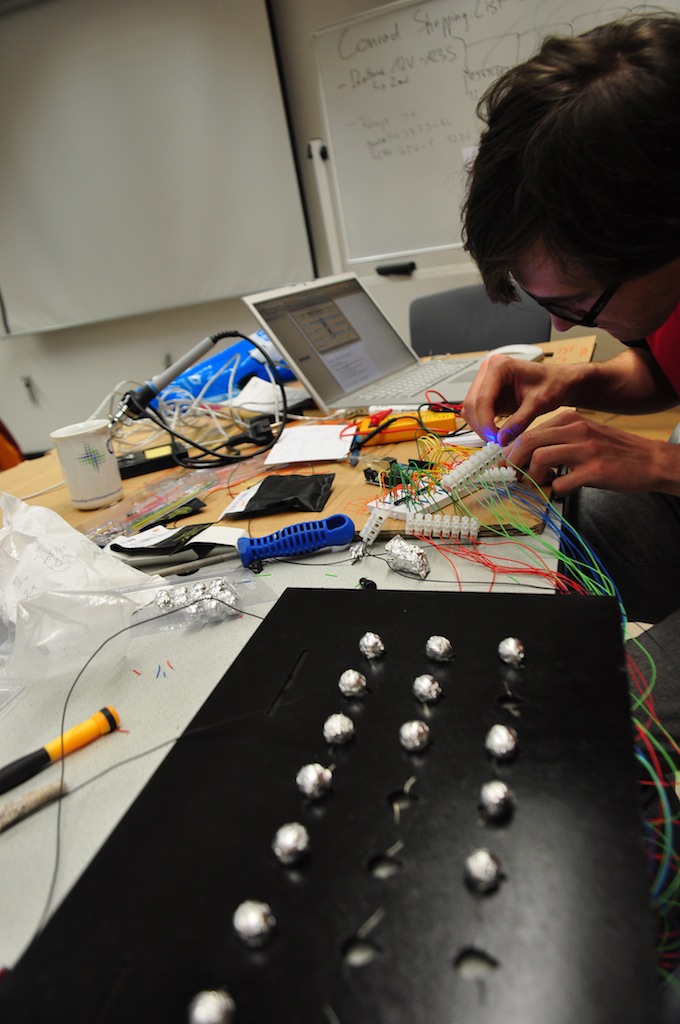
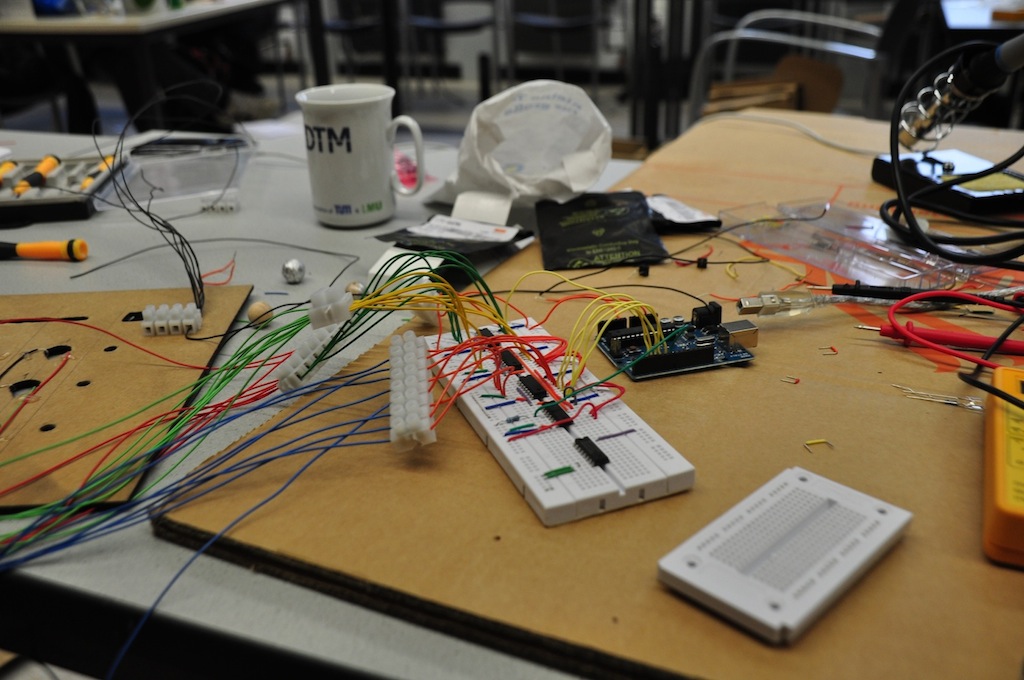
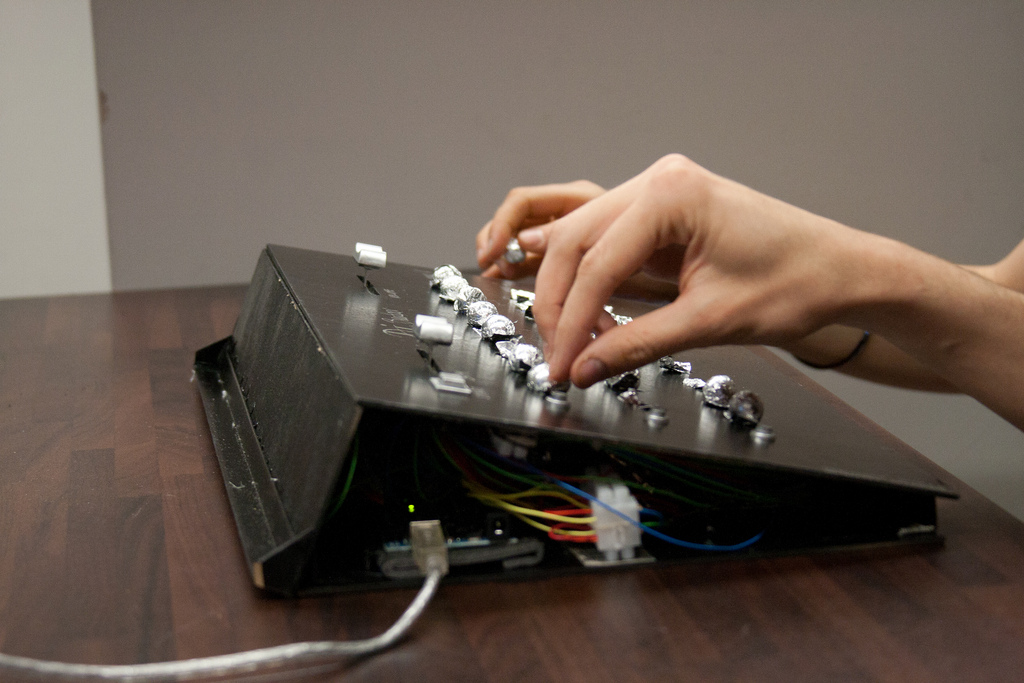
Hardware: Arduino, breadboards, aluminum foil and tons of hot glue
We used the workshop of the TU München to work on the hardware. Diana designed the case out of medium density fiberboard material and spray painted it black. For the marbles there are 24 holes, each with two wires. One of the wires goes into a common 5V power supply, while the other wire (24 of them in total) goes into a 4051 multiplexer cascade. To indicate the current beat just like in the software, we decided to let a blue LED shine through the three holes of a beat. The bottom plate therefore features seven separators to ensure that the LED just glows for one beat at a time. The eight LEDs are also controlled through a 4051 multiplexer. Due to time constraints, the whole electronics were laid out on a breadboard. The software running on the Arduino basically just reads out the current state of the 24 marble holes and updates the LEDs according to the OS X desktop software. Since our budget was limited, we couldn’t afford (conducting) steel marbles, so we had to go with wooden onces, which we wrapped with conducting aluminum foil.

Wrap up
So after three full days of work (I’m still amazed about what one can achieve in such short time, when really focused) we had a working beat box. Our study backgrounds (Industrial Design and Computer Science) really fit together perfectly and among other projects, we will present our controller at one of the CDTM Inspire&Dine sessions.